Is dual PC streaming worth it?
With the technology available right now, it’s hard to imagine that you’d need two PCs to enable high quality, simultaneous gaming & streaming. In some circumstances (which we’ll delve into) it will make sense, though there’s also an argument for not dual streaming, too.
Do I need to buy two PCs?
Not necessarily.
You probably have an old PC that you want to replace with a high-end gaming PC (from your favourite custom PC builder, perhaps?). Maybe you’re also thinking of taking streaming seriously, with a HD stream. Don’t throw out your old PC or give it to a small child so they can play Among Us. You can use the PC – even if it is low spec – as a dedicated streaming PC.
Your new PC will be used solely as a gaming PC, sending the video and audio stream through the streaming PC.
There’s no question that dual streaming works much better than doing everything on one PC. The real question is – do you need a dual streaming setup?
Do I need dual PC streaming?
If you are new to streaming, or plan to start your streaming journey, then the best advice would be to try it out with 720p streaming (which is more than acceptable) and see if it is for you. Figure out how much time you can devote to live streaming games, and how much commitment you can handle.
Dual streaming is simple enough to set up, but is an added expense. Before spending any more money than you already have, you should try streaming to see if it is worth setting up a dedicated streaming PC in the first place.
Gaming PC Recommendations
AMD and Intel both offer incredibly powerful multi-threading processors, and a 12th, 13th or 14th-Gen processor, 32GB – 64GB of memory and a dedicated graphics card (as well as an excellent broadband connection) will definitely allow you to get started in live streaming. A solid motherboard is also essential to control all of the bells and whistles you have attached to your PC.
Most people would advise making sure your gaming PC is as powerful as your budget allows, getting a high quality microphone, and having decent lighting over investing in a dual streaming setup from the outset.
Pros and cons of dual PC streaming
Pros of a dedicated streaming PC
- Enables better heat management
- Ability to add additional cameras and viewpoints easier
- Reduced workload = reduced lag in stream
- Ability to stream with higher graphics & visuals settings
The main benefit is the ability to withstand any game crashes, GPU errors or system errors during a live stream. Your stream will not go off air, and you will be able to communicate with your viewers while you remedy the problem. Games crash all the time, and having the ability to keep your stream going and retain your following is a huge bonus.
Having a dual PC streaming enables you to stream high quality video and audio, so if you are looking to make money from streaming, then a dual setup is ideal in the long run.
Cons of a dual PC streaming setup
- Initial outlay and extra electricity/costs
- Screen tearing can be a problem
- Can be complex to fix issues
- Possibility of extra background noise from PC fans
What you need for dual PC streaming
Recommended GPU
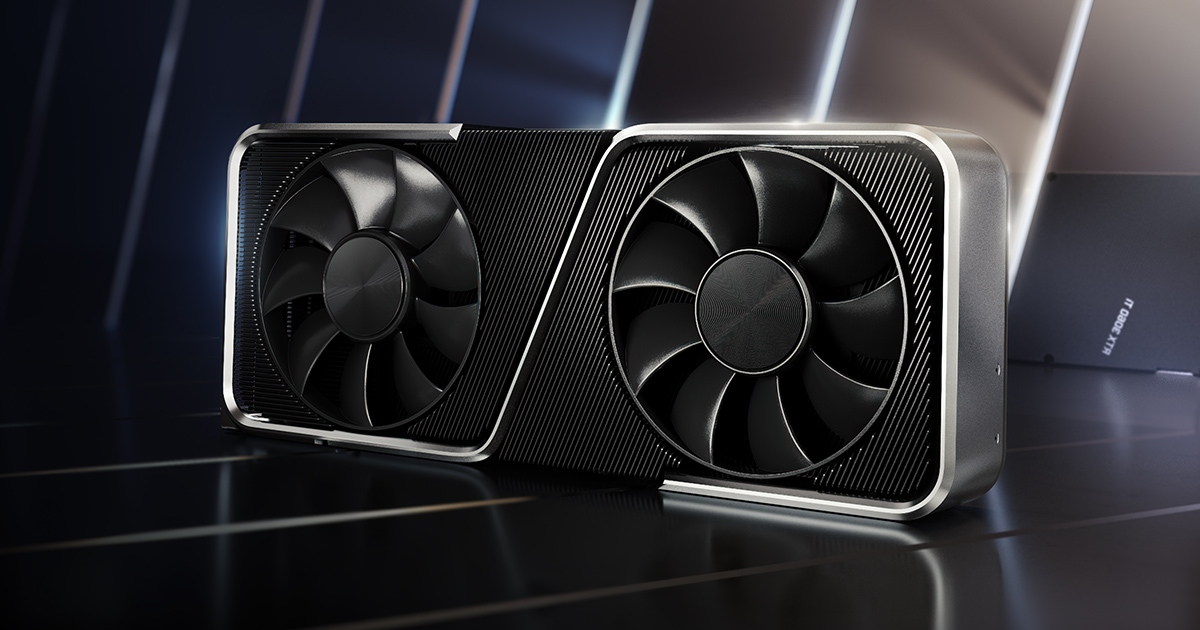
A gaming PC such as the Evolution Intel Core i5 RTX 3060 Gaming PC with the Nvidia GeForce RTX 3060 offers extremely powerful gaming as well as HDMI 2.1 and 3x DisplayPort outputs to have up to four monitors attached. With 16GB DDR4 RAM and multi-tasker in the Intel Core i5 14400F this provides the best starting point for a dual streaming setup. That said, with this kind of specification, you will be able to stream your gameplay without the need for a streaming PC, so make sure you check the pros and cons below before entering into this setup!
 RTX 3060 – Ideal GPU for Dual PC Streaming
Recommended Capture Card
The Elgato HD60 S offers 1080p capture, and is easy to set up for beginners. This card also has a line in, which (as we’ll detail below) is an integral part of the setup. The Razer Ripsaw HD also offers this, and can process up to 4K resolution.
Dedicated gaming PC recommended specifications
First things first, your new gaming PC will need a few accessories to enable you to dual stream.
- Dedicated Graphics Card: The GPU in your gaming PC needs to have two outputs – HDMI + HDMI or HDMI + DVI.
- Capture card: For dual streaming, a capture card is required to sit between your gaming PC and streaming PC. This device will send the video and audio to the streaming PC from your gaming PC, and take the burden off your processor, GPU and memory.
- Monitors: Two monitors are required for ease of use.
- Microphone: Most streamers recommend a high quality microphone and audio interface (see below), as you don’t want to get your audio wrong. Streams with tinny, high treble sound do not last long on Twitch or YouTube, and you will soon get complaints about your audio quality. There’s two options – option one is an XLR microphone which will require an audio interface device. Option two is a mic that is USB powered, which must have a line out/headphone jack feature.
- Audio interface: An audio interface will be required to plug in your game and voice from your gaming PC if you use an XLR mic, and send it to the streaming PC. The Behringer U-Phoria UMC22 USB Audio Interface is highly recommended, though there are other options that offer much more control over audio sources.
- Audio splitter: A simple 6-way 3.5mm audio splitter will enable you to connect all of the devices and sources. You’ll also need two male-to-male 3.5mm audio cables for the setup.
Dedicated streaming PC recommended specifications
A streaming PC does not require the latest, greatest, top-notch components. The minimum specification of hardware you’ll need in this PC is as follows: –
- Quad core processor
- On-board graphics
- 8GB DDR4 RAM
- USB 3.0 connectivity
Can I use a laptop as a dedicated streaming workstation?
When you look at these specifications, you would be forgiven for thinking a laptop would be sufficient for a streaming workstation. A laptop (providing it has the required I/O and specifications) can be used, and if you have one laying around doing nothing, even better!
How to set up dual PC streaming
Gaming & Streaming PC setup
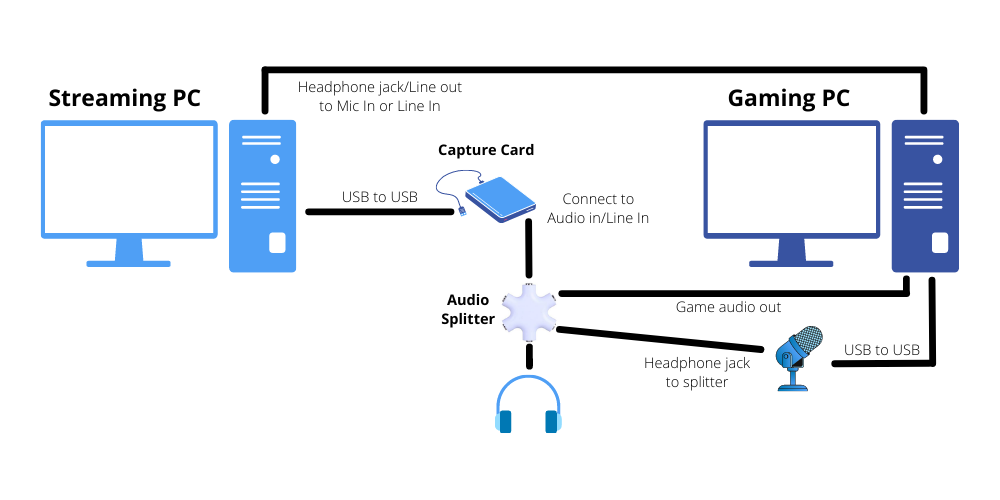
 Dual PC Streaming Diagram
Step by step
What you need:
- Headphones (without mic)
- Microphone
- 6-way audio splitter
- 2 x male-to-male 3.5mm adaptors
- Capture card
Dual streaming PC setup
In this section, we are going to set up the streaming PC.
- Connect your capture card to your streaming PC via USB 3.0 and connect your gaming PC to the capture card via HDMI
- Plug your gaming PC in to your main gaming monitor via DVI
- Connect your mic to your gaming PC via USB and then connect the line out/headphone jack to the audio splitter
- Plug your headphones in to the audio splitter
- Connect the audio splitter to the capture card via the line in jack
- Connect the audio out/line out on the gaming PC to the line in/mic in on the streaming PC
- For game audio: On your gaming PC, right click sound settings in the taskbar and click Open sound settings
– Make sure the sound output is going to your headphone output on your mic
- For mic audio: On your gaming PC, right click sound settings in the taskbar and click Open sound settings
– Click Sound control panel
– Choose the Recording tab, find your mic in the list, right click and select Properties
– Now click the Listen tab, and check the “Listen to this device” option. Select playback device and choose the cable that is connected to the audio splitter, where your headphones and capture card are plugged in
Using an XLR microphone & audio interface
Now, we’ll set up the audio if you’re using an XLR mic and audio interface, which is the preferred method by pro streamers. If you are using an audio interface with an XLR microphone, you will need to do the following instead: –
- Connect your capture card to your streaming PC via USB 3.0 and connect your gaming PC to the capture card via HDMI
- Next, connect your gaming PC to your main gaming monitor via DVI
- Now, connect your audio interface to your gaming PC via USB
- Connect the audio splitter to your audio interface via the headphone or speaker output
- Next, connect your mic to your to the audio interface
- Plug your headphones in to the audio splitter
- Now, connect the audio splitter to the capture card via the line in jack
- Connect the audio out/line out on the gaming PC to the line in/mic in on the streaming PC
- For game audio: On your gaming PC, right click sound settings in the taskbar and click Open sound settings
– Make sure the sound output is going to your audio interface
- For mic audio: On your gaming PC, right click sound settings in the taskbar and click Open sound settings
– Click Sound control panel
– Select the Recording tab, find your mic in the list, right click and select Properties
– Click the Listen tab, and check the “Listen to this device” option. Select playback device and choose the cable that is connected to the audio splitter, where your headphones and capture card are plugged in
Capturing video
In this section, we’ll look at capturing the game video from your gaming PC. The following setup should ensure you don’t lose any frames and your refresh rate isn’t affected during streaming.
- Right click on gaming PC desktop and click Display settings
- Make sure you can see your monitors and capture card
- Download OBS Studio on your gaming PC. You don’t need StreamLabs on your gaming PC.
- Open OBS Studio and create a Scene with Display Capture. Name this “Main Gaming Screen”
- Right click on the previewed screen and choose Fullscreen Projector > [Capture card] and select your capture card
- Now go into the video settings on OBS Studio, and check you are recording at a Base (canvas) that matches your monitor’s best settings (1920×180, 2560×1440 etc.). Output should also be the same, and you should have a framerate of 60FPS.
- Now, you should check in your Display settings (right click on desktop) that the resolution is also the same as above
Next, on your streaming PC:
- Install and open OBS Studio on your streaming PC
- Create a Scene using Video Capture device. Name this whatever your capture card is
- An audio source will then be created. Go to Settings, and select Audio
- Disable Desktop audio 1 and 2, and select Default for Mic/Auxilary Audio
If you want to hear any alerts from your gaming PC, you can enable Desktop 1 audio - Test everything!
Cameras
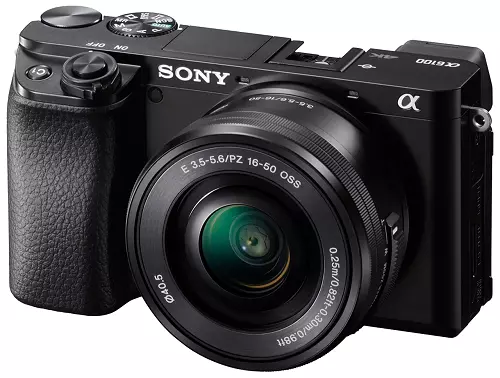
Adding a camera to this dual PC streaming setup can be very easy, or extremely complex depending on the type of camera you’re adding. A DSLR camera, for example, requires a separate capture device, whereas a USB webcam like the Logitech C290 is a plug & play method. We will look at how to set up cameras in another article, as this is quite an in-depth subject. For now, we recommend this video by Gael Level for setting up your camera and streaming it via OBS.
Conclusion
Overall, you will need a solid graphics card (RTX 3060 and above) in your gaming PC that has two display outputs at a minimum. The next thing you’re going to need is a game capture card/device. And if you want top-tier performance, you’ll need a second PC (Quad-core processor, on-board graphics, 8GB DDR4 RAM, USB 3.0 connectivity) and a second monitor.
Setting up dual streaming can be complex for beginners, and when things go wrong they can be a pain to fix. If you are brand new to streaming, the best advice is to try it before you attempt dual streaming. The benefits of dual streaming may not outweigh the complexity and extra cost for most people, so read the pros and cons above to figure out if it is worth it for you…


