At Chillblast we extensively prototype a specification before we release it for sale, just to make sure everything works as it should and guarantee our clients get a perfect experience right out of the box. This time we wanted to have a stab at something a little different, as well as answer a simple question – what’s the fastest small-form-factor PC you can create?
The CPU and GPU
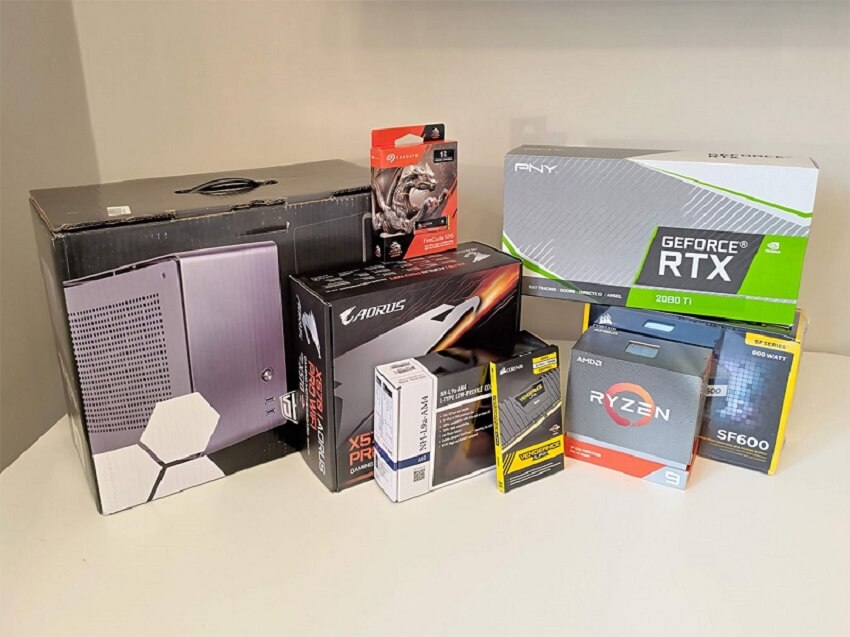
We wanted to build the ultimate SFF gaming rig, so chose the two most powerful ITX-compatible products on the market today – the formidable 16-Core, 32-thread AMD Ryzen 9 3950X and the exceptionally fast NVIDIA GeForce RTX 2080 Ti 11GB Video Card.
The Ryzen 9 is an exceptionally efficient and cool-running chip for its performance level, and the RTX 2080 Ti, although power hungry, is still more than capably cooled by a dual-slot blower, as evidenced by NVIDIA’s reference design. For the purposes of our rig, we chose a PNY RTX 2080 Ti, which adheres to the reference PCB, and sports a stylish glossy black cooler.
Choosing the Case
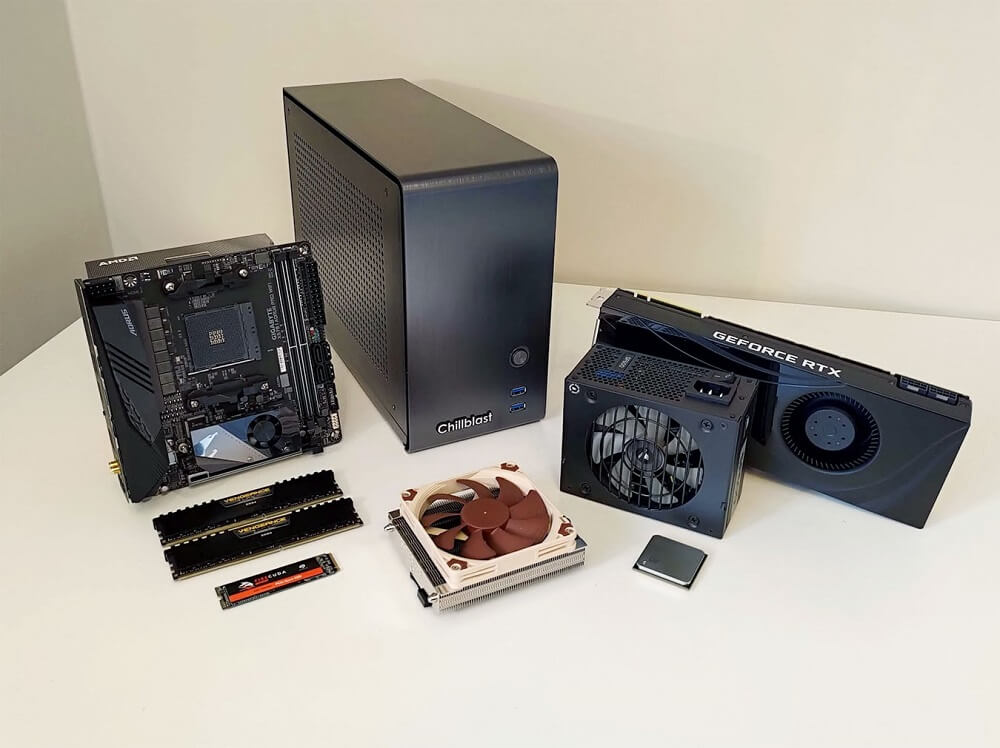
The single most important feature in building a small form factor PC is the case, as it dictates the dimensions of the overall PC. Naturally, we wanted to start with the Mini ITX form factor, as it is the smallest type of motherboard that will accept both standard desktop CPUs and video cards.
There are a plethora of small-form-factor cases on the market, with some models like the Phanteks Enthoo Evolv ITX and the now-ancient BitFenix Prodigy coming in at sizes barely any smaller than a standard Micro ATX tower. Neither of these would suffice for our pocket rocket, however, so we explored the very smallest chassis on the market that still accommodates a standard-length dual-slot video card.
The Dan Case
Inarguably the most famous ultra-small mini ITX case that meets our size criteria is the Dan Case A4-SFX; brainchild of German designer Daniel Hansen. It measures a tiny 115 x 200 x 317mm in size, yet still has provisions for a Mini ITX motherboard with a low-profile CPU cooler and a separate chamber with space for a full-length dual-slot video card.
Unfortunately, after spending a significant amount of time with the Dan Case, we just couldn’t get the thermals to work. With our high-end CPU and GPU choices, the temperature continued to rise until it eventually throttled. This was a big shame because the Dan Case has a beautiful build quality and would have otherwise been ideal for our project.
The Kolink Rocket
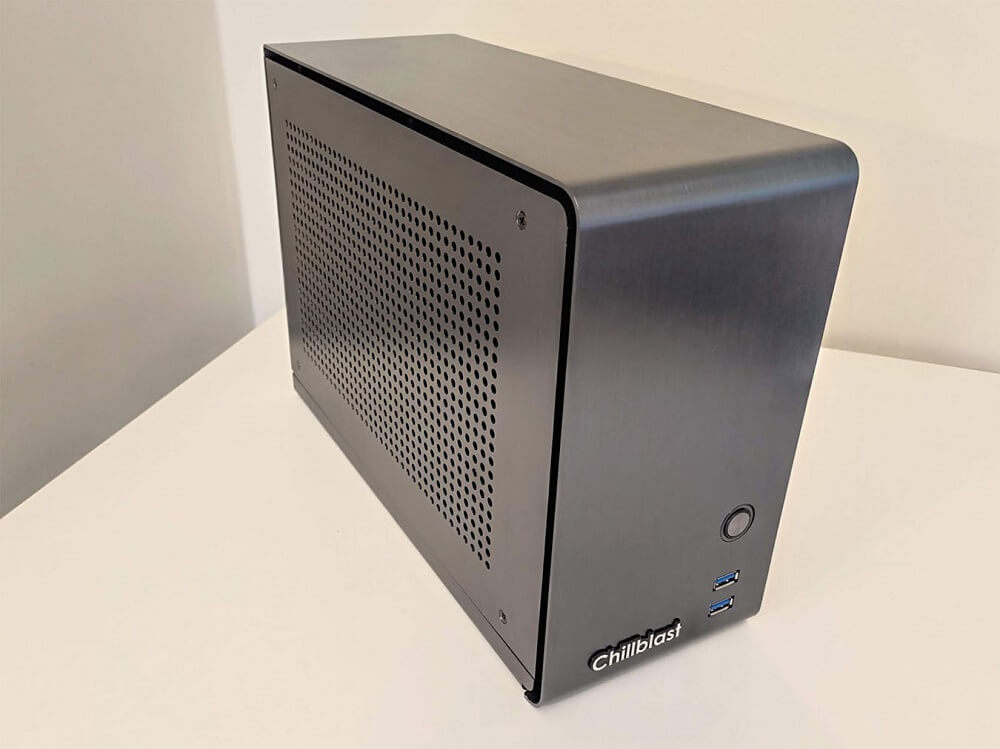
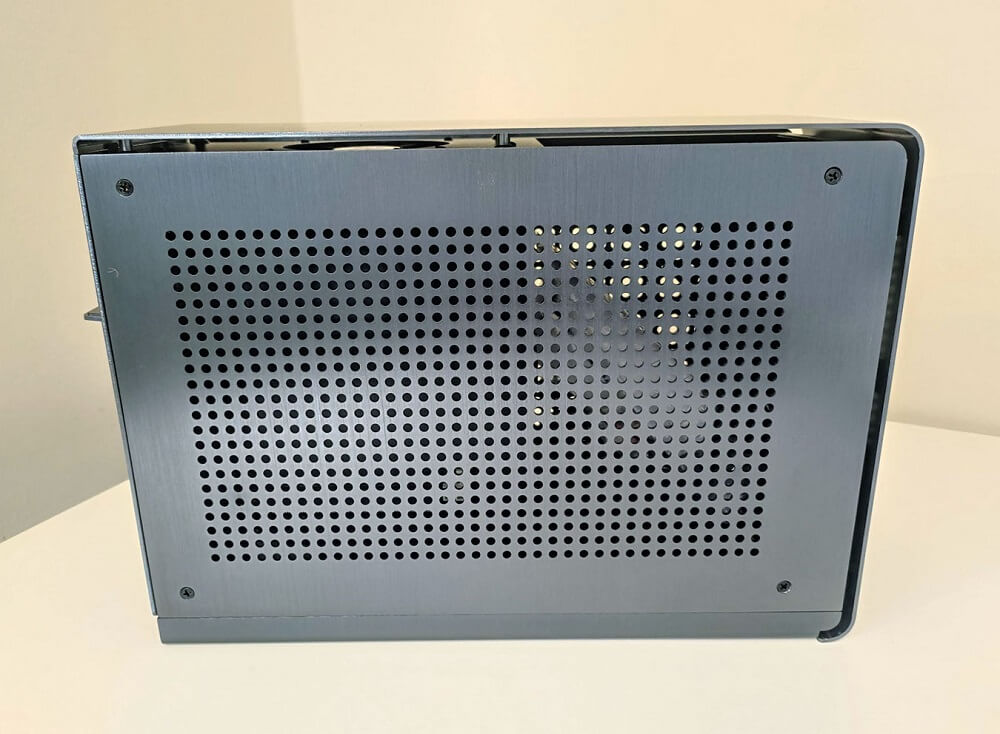
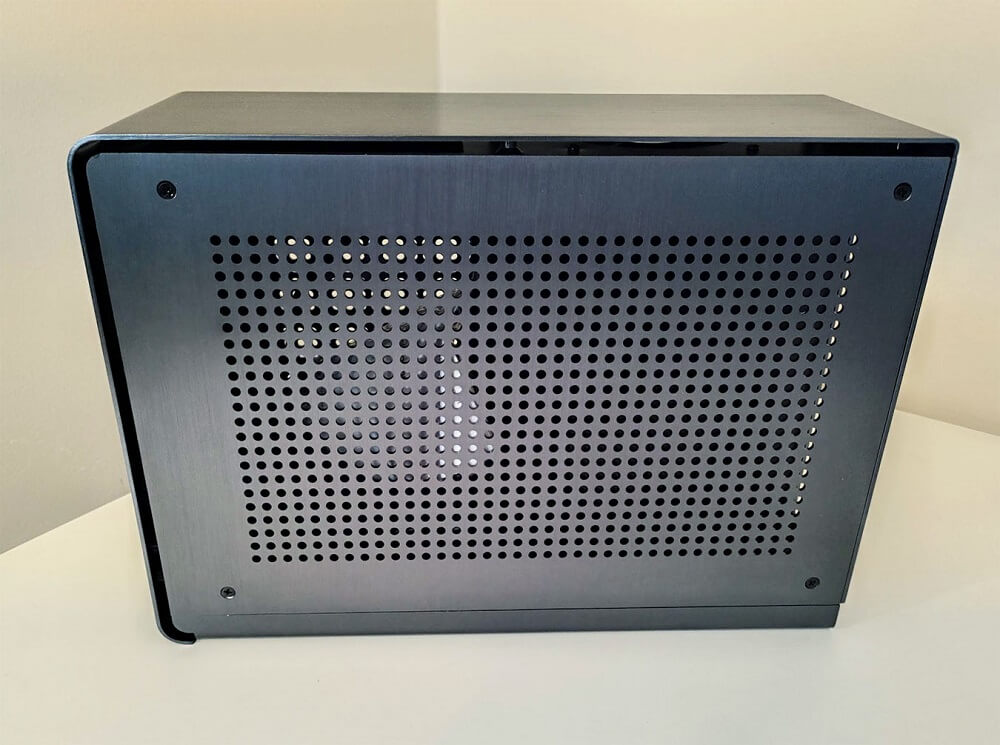
This led us to look for other cases inspired by the Dan Case, but with a little more thought given to airflow. Eventually, we settled on the Kolink Rocket, a pint-sized powerhouse that’s barely larger than the Dan Case at 125mm x 235mm x 328mm.
Improvements compared to the German design include a 5mm vent that runs around the whole perimeter of the chassis to allow the dissipation of heat by convection and, even more importantly, the presence of an 80mm PWM cooling fan in the roof. As with the Dan Case, the chassis is made of brushed aluminium and there is a smorgasbord of vents around the outside of the case to allow the various fans to breathe freely.
Other Components
We wanted the best possible performing motherboard to couple with our Ryzen 9 and settled on the awesome Gigabyte X570 I Aorus Pro Wifi. This phenomenal board has features that put many full ATX motherboards to shame, including dual M.2 slots for ultra-fast storage, dual USB 3.1 Gen2 ports and 802.11AX wi-fi as standard. It also has RGB headers and stylish heatsinks, which is obviously extremely important in a fully enclosed case with no windows.
We also invested in some Corsair Vengeance LPX 3200MHz DDR4 memory, specifically tuned for Ryzen setups, and a Seagate FireCuda 520 SSD – the fastest Gen 4 SSD we’ve tested and the only one to achieve a breath-taking 5GB/s transfer rate in our in-house benchmarks. Finally, we had to choose a PSU, for which we chose the Corsair SF600. This small but mighty PSU would be a little borderline with an overclocked desktop spec, but in our SFF build where we are expecting to temper the Ryzen 9’s power consumption somewhat, it’s more than up to the task.
The Cooler Face Off
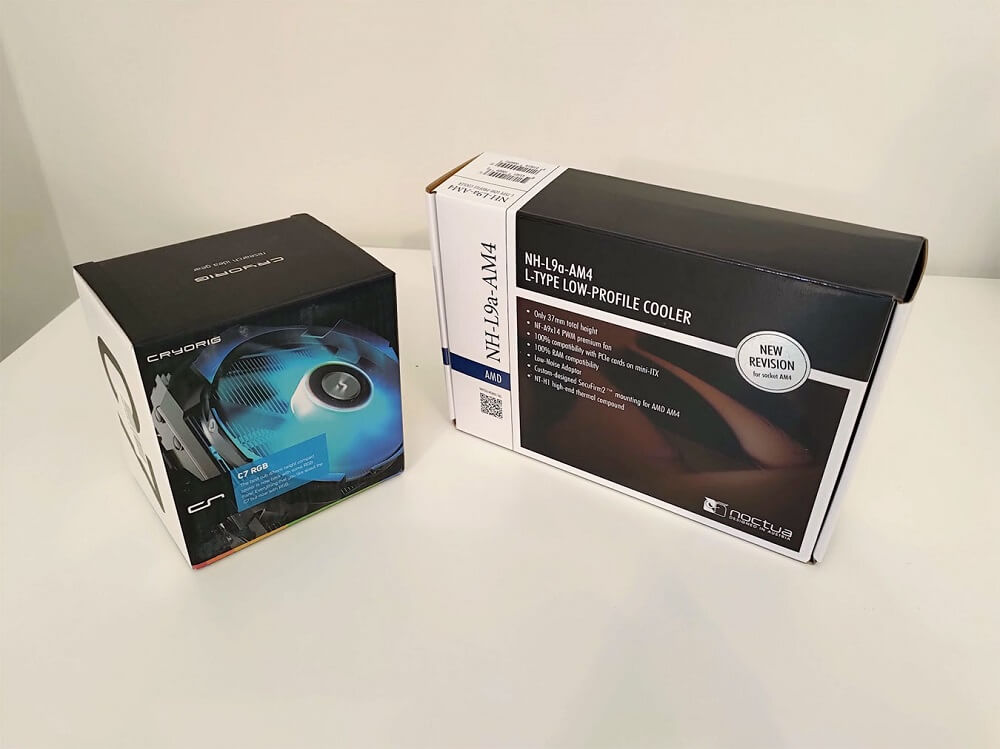
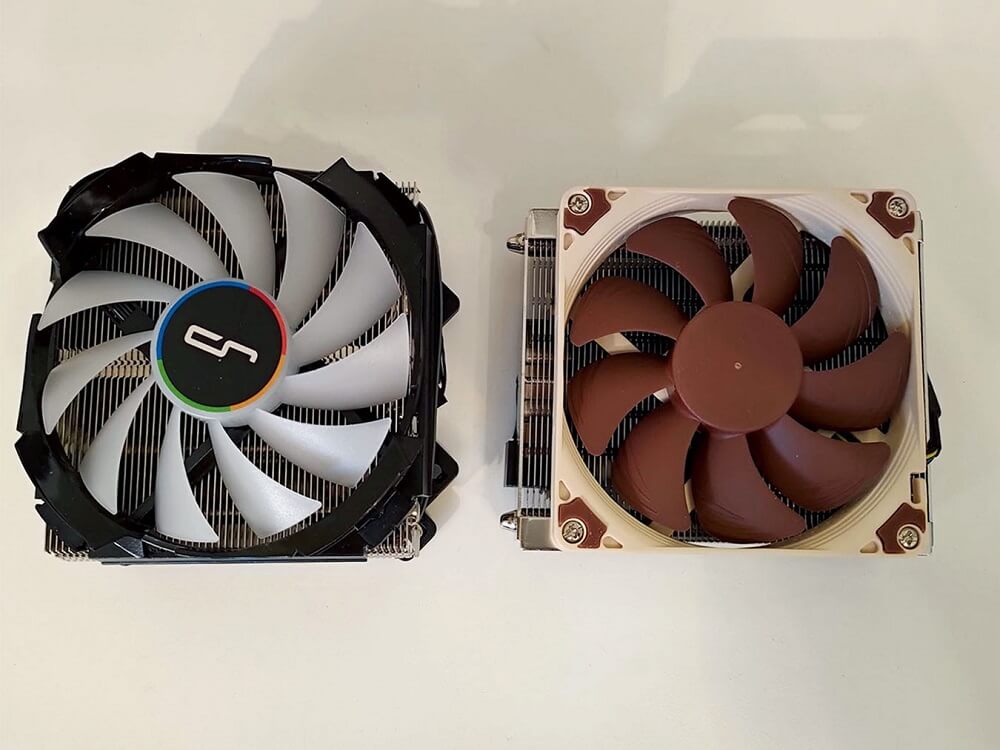
We chose two candidate coolers for this project, both of which have a great reputation for effective cooling in a small footprint system – the C7 from Taiwan-based Cryorig and the Austrian Noctua NH-L9A-AM4. Different Chillblast team members had their pre-conceived opinion on which would be better, but the proof of the pudding is in the eating, so we went about testing the thermal performance.
Now, let’s get this out of the way first – neither the C7 nor the Noctua can cope with the 3950X running using the stock BIOS profile. Although AMD rates the chip to a 105W TDP, most motherboard manufactures automatically allow the chip to turn the wick up all the way to 145W to enable better turbo performance. That’s fine when using a 240mm AIO or a large tower-format heat sink, but there’s no place for such cavalier heat dispersion in a small form factor build.
Testing the Thermal Limit
A feature present on all Ryzen chips is the ability to elegantly fine-tune the performance profile of the processor by PPL or “Package Power Limit”. This retains all of the clever turbo and clock speed management of the processor, whilst keeping the TDP (Thermal Design Power) at whatever level you choose. In short, the TDP is the maximum heat, in watts, that a computer’s cooler is designed to dissipate under any workload.
Cryorig rates the C7 to a TDP of 100W, which is mighty impressive for a 47mm tall cooler. Noctua rates the L9I-A for a slightly more conservative 95W.
We used the PLL limiter in Gigabyte’s well laid-out UEFI (BIOS) to 100W and fired up a few benchmarks designed to test thermal limit. These include Linpack, Cinebench R20, and the oldie-but-goodie; Prime95 in Blend with AVX. At 100W both coolers eventually reached the 95-degree temperature limit that causes the chip to throttle. (We also wouldn’t advocate running a CPU so close to its thermal limit for long term usage.)
When winding back the wattage to 95W, both coolers peaked at just under 90 degrees Celsius under sustained load, suggesting that Noctua has been rather more honest with its TDP limit.
What About Noise Levels?
With both coolers therefore matching each other punch for punch, we decided to even the odds a little by upgrading the Noctua cooler’s fan from the default NF-A9x14 to the taller NF-A9 PWN unit. This uprated fan is 25mm deep and spins at 2000rpm compared to 14mm and 2500 RPM of the standard unit.
With this taller fan, the Noctua sits at 48mm tall, just 1mm higher than the C7. The taller fan can shift 78.9 M3/h of airflow compared to the 57.5 M3/h of the original, and does so at a slightly lower noise level – 22.8dB(A) vs 23.6dB(A). That’s a difference that doesn’t sound like a lot on paper, but noise is a characteristic defined by more than just decibels – the pitch and tone are equally important.
There’s Only One Winner
It is here that the Cryorig and the Noctua are poles apart. There’s no getting away from it; the C7 is a loud cooler. Cryorig quotes 30 dBA, but our digital sound meter recorded 48.5 dBA at 30 centimetres from the cooler at full speed. The Noctua registered 41 dBA with the default fan unit and 38dBA with the uprated fan – which makes it almost half as loud as the Cryorig.
The dBA scale is logarithmic, meaning a 10dBA increase means a doubling in volume. To be clear, either cooler in a 65W media PC build will be kept at a reasonably quiet volume by the PWM feature of the motherboard, but in our monster build the full-speed noise output is a very considerable factor, and it is here that you’ll definitely want the Noctua unit. Those put off by the classic Noctua “coffee and cream” colour scheme can always opt for the “Chromax” all-black variant.
With the updated fan, the Noctua operates at a consistent 5 degrees Celsius cooler than the C7 whilst emitting half the noise level. At this point our decision was made and it’s Austria 1, Taiwan 0. We achieved around 85 degrees at a 95W PLL in an open-case environment at full load, so we settled on a target of a more conservative 90W as our final PLL setting for the system once installed into the case.
The Build
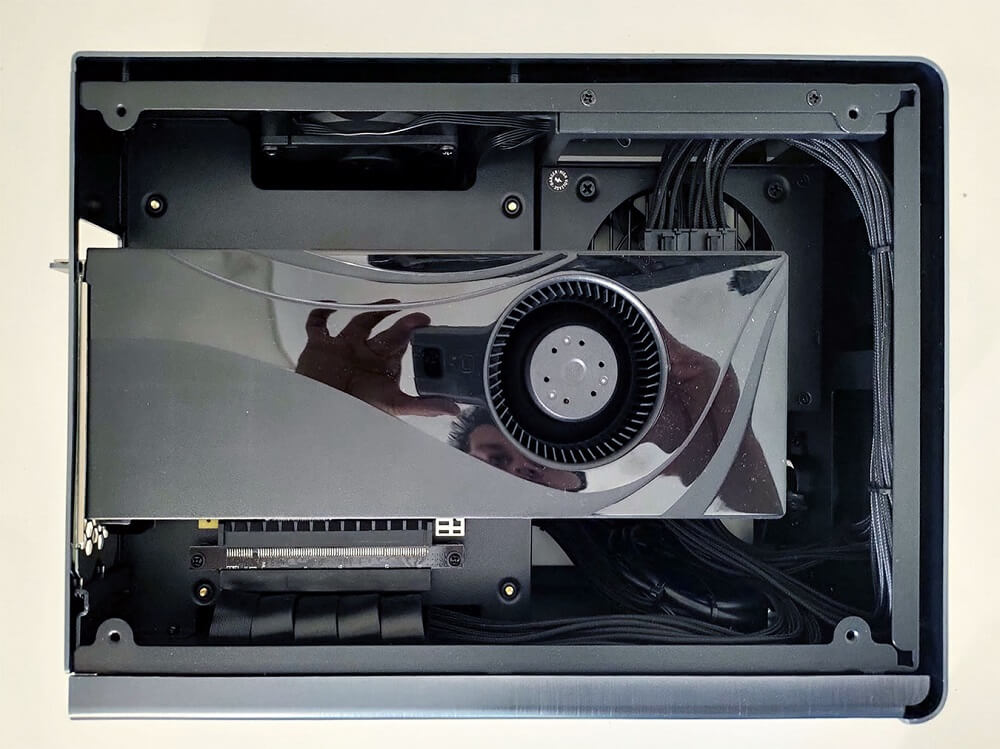
The first step of our build was to install the CPU, M.2 SSD and memory into the motherboard. This assembled module is then ready for installation into the case. Special care needs to be made to feed the PCI-E flexible riser under the motherboard in the Rocket, and this must be tightly tucked under the base of the board to ensure the riser does not stall the fan.
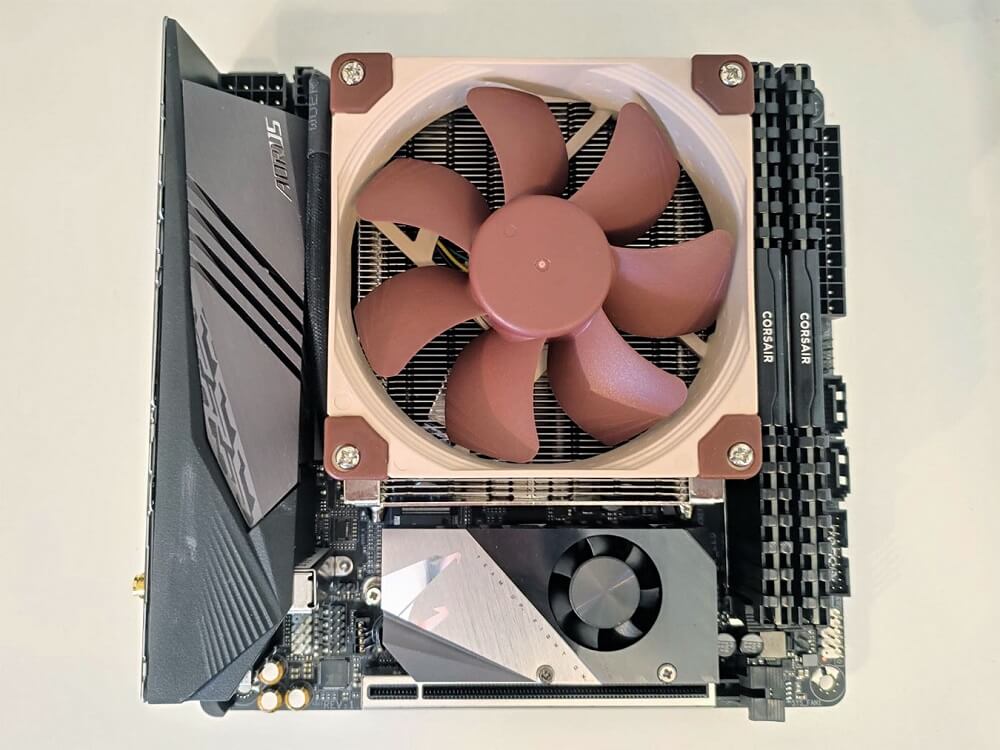
With the board in, the next task is to fit the PSU in its neat little bracket and carefully run cables to the relevant headers on the motherboard. We also used this opportunity to connect the USB and switch/LED headers to the board and tie them neatly. Chillblast always prides itself on excellent cable management, but in a tiny build such as this one, it becomes more important than ever.
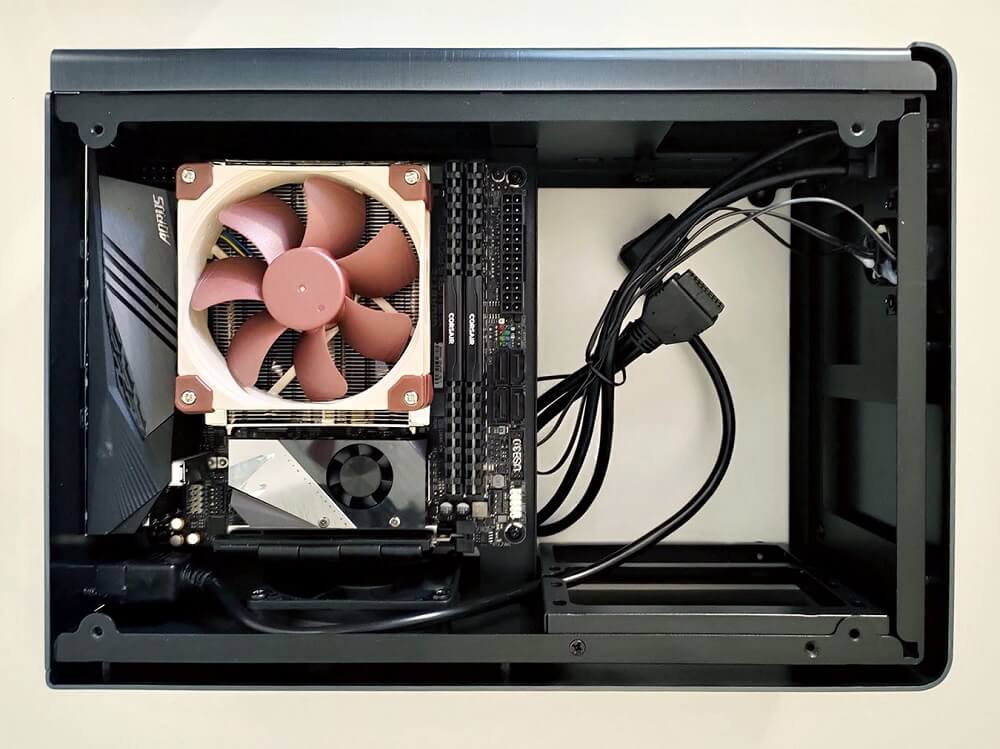
With the PSU locked in, the final job is to install the video card and its associated PCIe power cables, perform a final tidy up of the cabling and wipe off all the fingerprints from the chassis. We also took the opportunity to fit a Noctua in-line resistor between the case fan and the motherboard, as this little fan runs far too quickly and untempered, undoing all of the good work we put into optimising the CPU cooling.
Setting up the BIOS
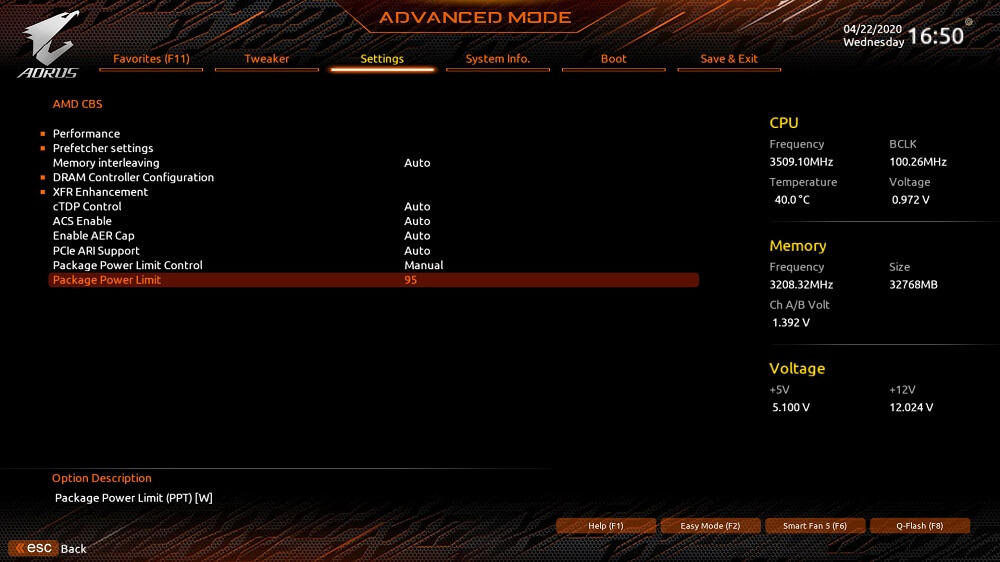
Within the UEFI we set our memory to “XMP” mode to correctly define the voltages and clock frequencies, and also set the PLL to 90W as previously mentioned. This stops the chip from ever leaving a 90W TDP power envelope, and keeps CPU temperatures within the capability of the cooler.
It is this incredibly elegant level of control that makes the Ryzen platform the new ideal when it comes to SFF builds. You can achieve similar results with Intel processors with various tweaking of the advanced turbo and voltage settings, but not without hours of testing and tweaking. AMD makes it simple with a single numerical setting that you can tweak up and down, either in the BIOS or even from within Windows using the exceptional Ryzen Master software.
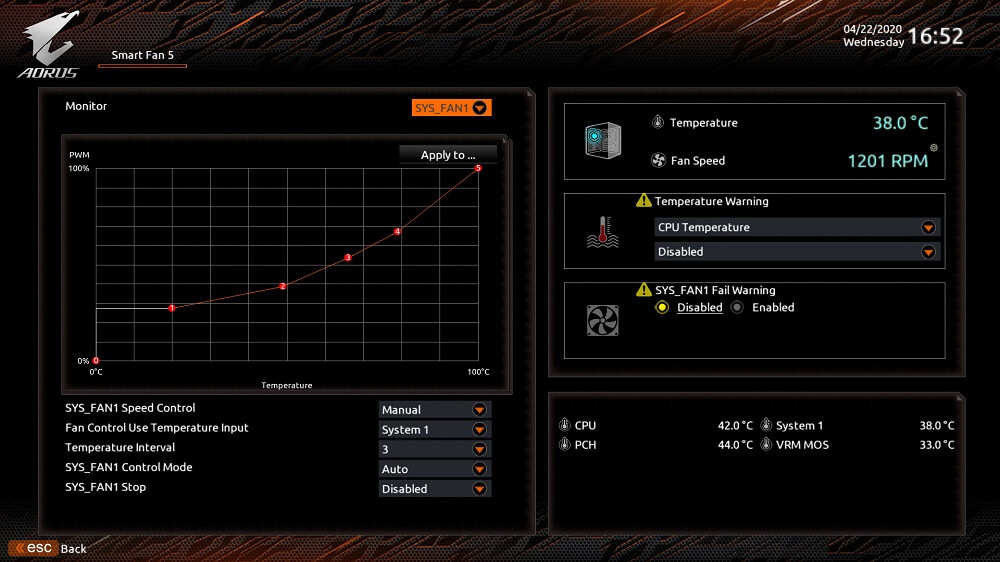
While in the BIOS we set a custom fan profile for the case fan to further temper its full-speed antics. Kolink did a great job with the Rocket case as a whole, but this fan (without being carefully adjusted with both the in-line resistor and in software) is truly a banshee, emitting a level of noise that no hearing person would reasonably tolerate. With our modifications, it’s quiet and still very effective at exhausting heat through the top venting.
The Completed Build – Benchmarks and Thermals
Many said it couldn’t be done, but our completed SFF system shows that you can indeed cram a 16 Core workstation-grade PC inside a case not much larger than an Xbox One. The thermals are absolutely stellar with the PLL set to 90W, with the CPU maxing out at a wholly-acceptable 23 degrees below the throttle point.
The Pocket Rocket also has a performance level that really doesn’t give up much to a system running in a full-sized tower. To see where you get your gains and losses we ran a mixture of single-threaded and multi-threaded workloads of the Pocket Rocket limited to 90W PLL and pitted it against the same setup with an H100i connected and the wick turned all the way up to normal.

As we expected, the TDP limited does impact performance, particularly when all of the cores are being stressed. Here some of the turbo frequency needs to be reduced in order to keep the chip within its envelope.
In Cinebench R10 we saw a drop of 9%, and in the whole-system test, PC Mark 10, a drop of 3%. For more lightly-threaded loads the differences are basically zero, simply because not enough of the chip’s cores are deployed for it to get anywhere near peak TDP, so the turbo behaviour is totally normal. For the vast majority of people, there will be no perceptible performance impact of using the Pocket Rocket compared to a full-sized desktop, and for those needing the full grunt of the CPU at all times, that performance impact is limited to less than 10%.
It’s A Mini Beast
Could we unlock more performance by being less conservative with the PLL and by allowing more system noise? Absolutely we could, but to what end? This PC is already fast enough to run virtually any game out there at 4K, smash through any rendering or computation workload at up to 4x quicker than a “normal” powerful desktop computer and does so with minimal fuss, noise and footprint.
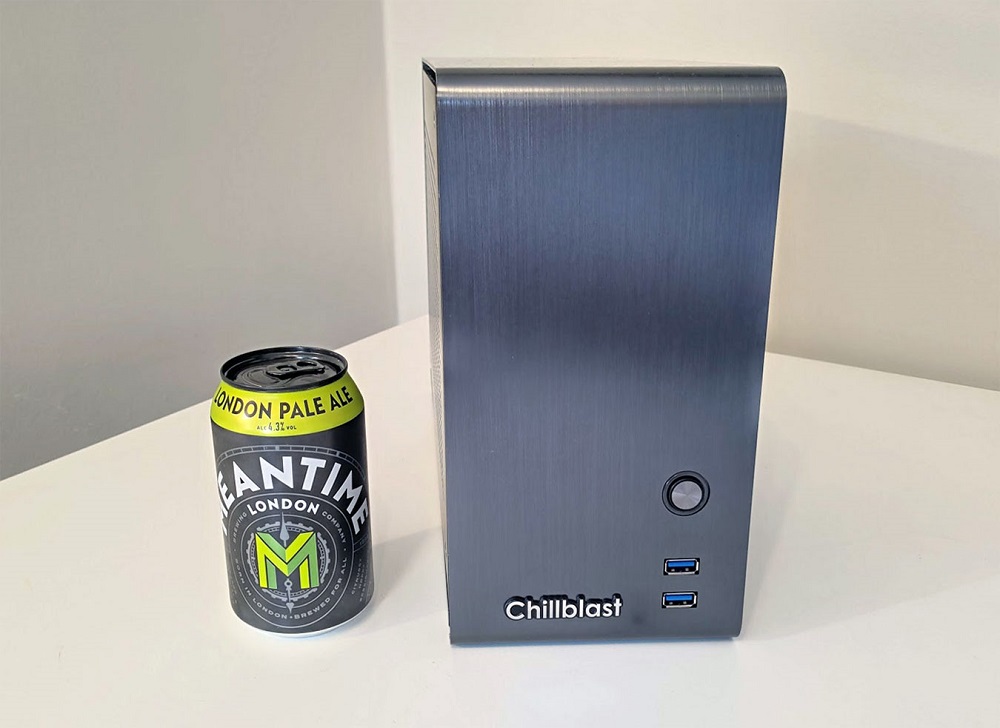
Those wanting to be more adventurous also have the luxury of being able to tweak power level and therefore the performance and thermal balance in real time without even having to reboot, all thanks to the Ryzen Master software that we will be pre-installing on this PC. Yes, that’s right – you can buy your very own Chillblast Fusion Pocket Rocket Ultimate SFF PC right here!


